Knowledge base
The /knowledge-base library: folders, uploads, links, labels, required reading, and what patients can see.
Knowledge base is your account's shared file library — training documents, policies, protocols and links your team reads, plus the handful of entries you choose to publish to patients.
Questions people ask about this page
Why can I see files but no Upload Files button?
You are signed in as Client Staff. Only a Client Admin can add, rename, move, label, delete or publish knowledge base entries at a client. Client Staff gets read, search, download and CSV export. Ask an admin to add the file.
Can patients see what I upload?
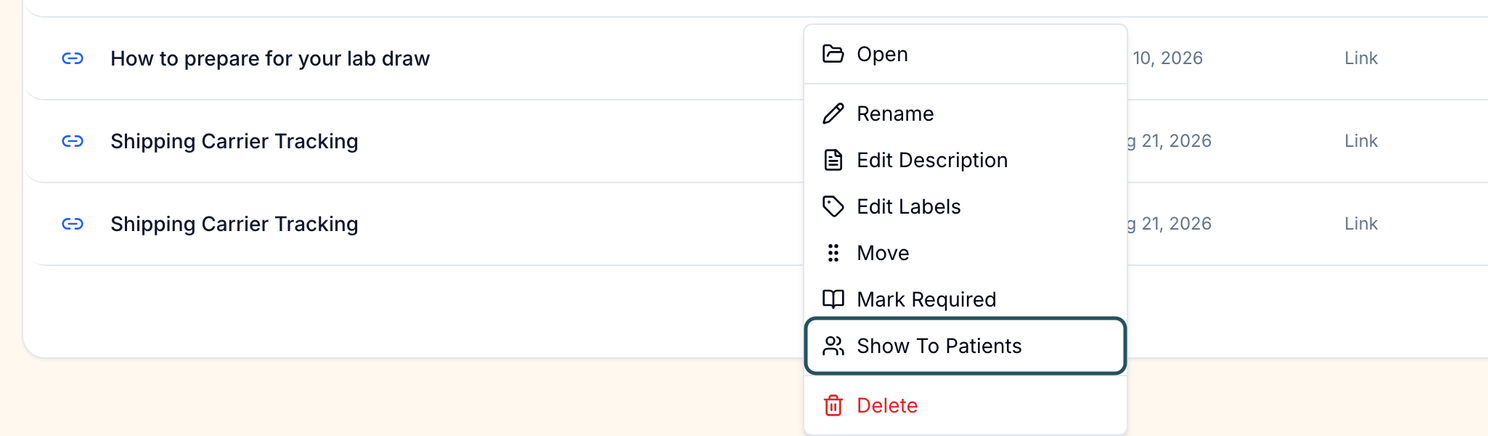
Not by default. Everything is staff-only until you turn it on. Right-click the entry and choose Show To Patients. It flips to Make Staff Only once published. The Upload Files and Add Link dialogs carry a matching checkbox labelled Visible to patients.
Where is the right-click menu? I only see the file.
Right-click (or long-press on a touch screen) the tile or the row itself. The menu is titled with the item's name and holds Open, Download, Rename, Edit Description, Edit Labels, Edit Text, Move, Mark Required, Show To Patients and Delete. Client Staff sees only Open and Download.
What does Mark Required actually do?
It flags the entry as required reading and lets you filter the library down to it with All Requirements → Required. It does not lock anyone out of the product and it does not chase people. Keep the required set short so it stays meaningful.
Can I write an article here instead of uploading a file?
Not from scratch, on a client account today. The rich-text editor exists — dialog Create Text Entry / Edit Text Entry — but the only control that opens it is the right-click Edit Text action on an entry that is already a text entry. There is no "new text entry" button on the Client knowledge base. Upload a document, or paste your text into a document and upload that.
Can I turn a PDF into a form?
Not from a Client account. Generate Form and the upload checkbox Generate draft forms from uploaded PDFs and images only appear for a Provider Network Admin working in a provider network knowledge base. Build client forms on Forms instead.
My upload is still going. Can I leave the page?
You can move around the app, but keep the browser tab open. Uploads run in a background panel with the states Queued, Saving and Failed, and a Dismiss upload status control. Closing the tab stops work that has not finished.
What are labels for?
Free-text tags you type comma-separated (the field hint is Policies, Training, Intake). They power the All Labels filter, so a label is the fastest way to group entries that live in different folders.
Where to find it
Left menu → Knowledge base. Direct link: /knowledge-base. Visible to: Client Admin, Client Staff, and Patients (patients see only entries you published). The page heading is title-cased Knowledge Base, unlike the menu label.
Your sub-line reads "{your client name} resources for internal training, media, and reference materials." That is the intended use — this is not patient record storage. Patient documents belong on the patient profile's Documents tab.
What is on this page
| What you see | What it does |
|---|---|
| Search box | Placeholder Search knowledge base... Matches names, descriptions and labels. |
| List / Grid toggle | Switches the view. Group label Knowledge base view mode. Grid shows tiles; List shows a table. |
| All Labels | Filter by any label you have typed on an entry. The pill only renders once at least one entry carries a label, so a new library has no All Labels button. |
| All Types | Filter chips with counts: Folders, Links, Text Entries, PDFs, Images, Videos, Files. |
| All Requirements | Required or Optional. |
| Clear all | Drops every filter and the search term. It only appears once something is filtering. |
| Export CSV | Downloads the visible library. Columns: Title, Type, Folder Path, URL, Audience, Required, Labels, Status, Created. Both Client roles get this. |
| Upload Files | Client Admin only. Opens the Upload Files dialog for the folder you are in. |
| Add Link | Client Admin only. Opens the Add Link dialog. |
| Create Folder | Client Admin only. Opens the Create Folder dialog. |
| List columns | Name · Labels · Updated · Type / Size |
| Drag and drop | Drag an entry onto a folder tile to move it. Inside a folder, a drop target appears at the bottom left to move an item back out. |
The right-click menu, item by item
Client Staff sees Open and Download only. Everything below that is Client Admin.
| Menu item | What it does |
|---|---|
| Open | Opens the viewer, the folder, or the link. |
| Download | Downloads the file. Files only, not folders or links. |
| Rename | Dialog Rename Entry — Choose the new display name for this entry. |
| Edit Description | Dialog Edit Description — Update the description shown throughout the knowledge base. |
| Edit Labels | Dialog Edit Labels — Add comma separated labels for search and filtering. |
| Edit Text | Opens Edit Text Entry. Only on entries that are already text entries. |
| Move | Dialog Move Entry with a Destination folder select (placeholder Select destination, top option Root). |
| Mark Required / Remove Required | Toggles required reading. Not offered on folders. |
| Show To Patients / Make Staff Only | Publishes or unpublishes to your patient portal. |
| Delete | Removes the entry. Shown in red. |
| Generate Form | Queues a draft form from a PDF. Provider Network Admin only — it never appears on a client knowledge base. |
How to upload files into a folder
Open the page
In the left menu, click Knowledge base.
Go to the folder first
Click the folder tile. The dialogs default their Target folder to wherever you are standing, so opening the folder before you upload saves a move later. Staying at the top level targets Root.
Start the upload
Click Upload Files. The Upload Files dialog opens with a Target folder badge showing the destination.
Choose the files
Drop them on the dialog or use the file picker. Selected files list underneath with a remove control on each.
Describe them once
Fill Description (placeholder Optional description for the uploaded entries) and Labels (placeholder Optional labels, comma separated). Both apply to every file in this batch.
Decide the audience
Tick Mark uploaded entries as required if the team must read them. The second checkbox is labelled Visible to patients on screen (its screen-reader name is Make uploaded entries visible to patients) — tick it only if patients should see them. Leave both clear for ordinary internal files.
Upload and keep the tab open
Confirm the upload. A background panel tracks each file through Queued and Saving. Dismiss it with Dismiss upload status when it finishes.
How to save a web link
Open the folder, then click Add Link
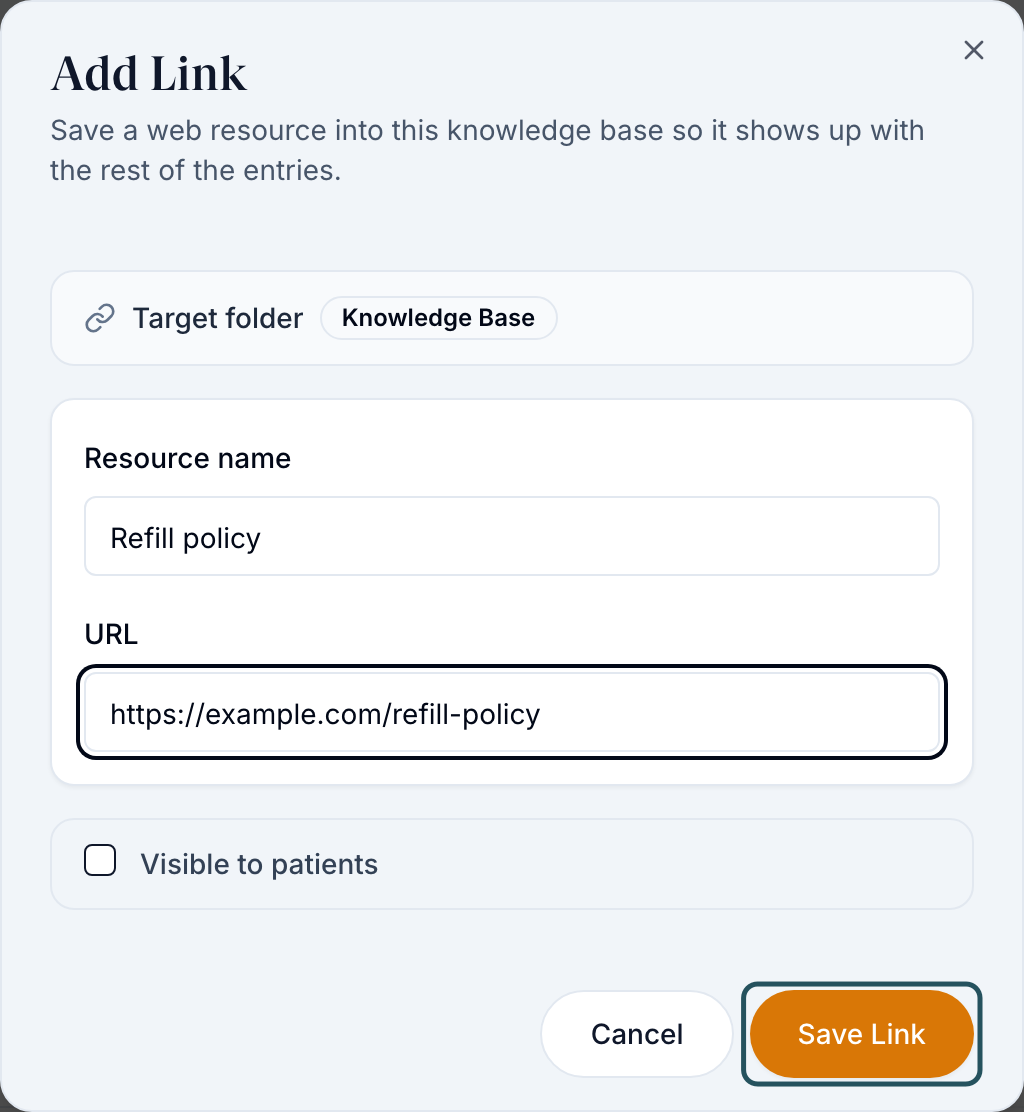
The dialog Add Link opens: Save a web resource into this knowledge base so it shows up with the rest of the entries. A Target folder badge shows where it will land.
Fill Resource name and URL
Resource name (placeholder Coverage Policy Portal) is what the team reads in the list, so name it for the job, not the vendor. URL takes the full address.
Choose the audience and save
Leave the Visible to patients checkbox clear for staff-only. Click Save Link. The entry appears with the type Links.
How to create a folder and file things into it
Click Create Folder
The Create Folder dialog opens: Create a new folder in the current location. Check the breadcrumb first — the folder is created inside whatever you are viewing.
Name it and save
Fill Folder name, then click Save.
Move existing entries in
Drag a tile onto the folder, or right-click the entry, choose Move, and pick the Destination folder.
How to publish an entry to patients
Find the entry
Search for it, or filter by label.
Right-click it
Choose Show To Patients.
Confirm the flip
The same menu item now reads Make Staff Only, and the CSV Audience column reflects the change. That is your only confirmation — there is no badge on the tile.
Check it as a patient
Patients reach the same library through their own portal and see published entries only. If a patient reports they cannot find it, re-open the menu and confirm it still reads Make Staff Only.
Statuses you will see here
Entries themselves have no lifecycle status. The only states this page shows come from background jobs.
| Status | What it means | What to do |
|---|---|---|
| Queued | The upload is waiting its turn. | Wait. Keep the tab open. |
| Saving | The file is being written into the library. | Wait. |
| Failed | That file did not upload. | Dismiss the panel and upload the file again. A very large file or a lost connection is the usual cause. |
| Required (filter value) | Someone marked the entry as required reading. | Read it. Remove the flag with Remove Required when it is out of date. |
What can go wrong
| What you see | Why | Fix |
|---|---|---|
| No Upload Files, Add Link or Create Folder buttons | You are Client Staff. Management is Client Admin only at a client. | Ask a Client Admin. Staff keep search, open, download and Export CSV. |
| No Generate Form item, and no generate checkbox on upload | Form generation is a provider network feature and is switched off for client knowledge bases. | Build the form on Forms instead. |
| You cannot find a "new text entry" button | There is not one on a client account. The editor is only reachable by right-clicking an existing text entry and choosing Edit Text. | Upload a document instead. |
| No items found / Try a different search or label filter. | A filter or search term is excluding everything. | Click Clear all. |
| This folder is empty | Real empty folder. | Use the Upload Files or Create Folder buttons in the empty panel. |
| Word document preview is not available in browser. | DOCX files cannot render in the viewer. | Use Download, or re-upload the file as a PDF so the team can read it in place. |
| A patient still cannot see a published entry | The toggle was flipped back, or they are looking at a different client's portal. | Right-click and confirm the item reads Make Staff Only, meaning it is currently published. |
| "Setting up your knowledge base." never resolves | Your user account is not linked to a client. | The message says it: contact your administrator. A Client Admin fixes this on the user record. |
Next
Was this helpful?